Creating an API with Flask in the Intelligence Module
To configure a Flask application in the Intelligence module, there are a few prerequisites. In this step-by-step guide, we will use a basic Flask application template.
Folder structure
.
├── app.py
└── main.orchest
Application code
from flask import Flask

app = Flask(__name__)

@app.route('/')
def welcome():
    return "Welcome to my Flask application!"

if __name__ == '__main__':
    app.run(host='0.0.0.0')
❗ Important note: it is essential to set
host='0.0.0.0'so your application is accessible from external IP addresses. With this configuration, the app accepts connections from any IP instead of only local connections, which would happen with127.0.0.1.
Environment setup
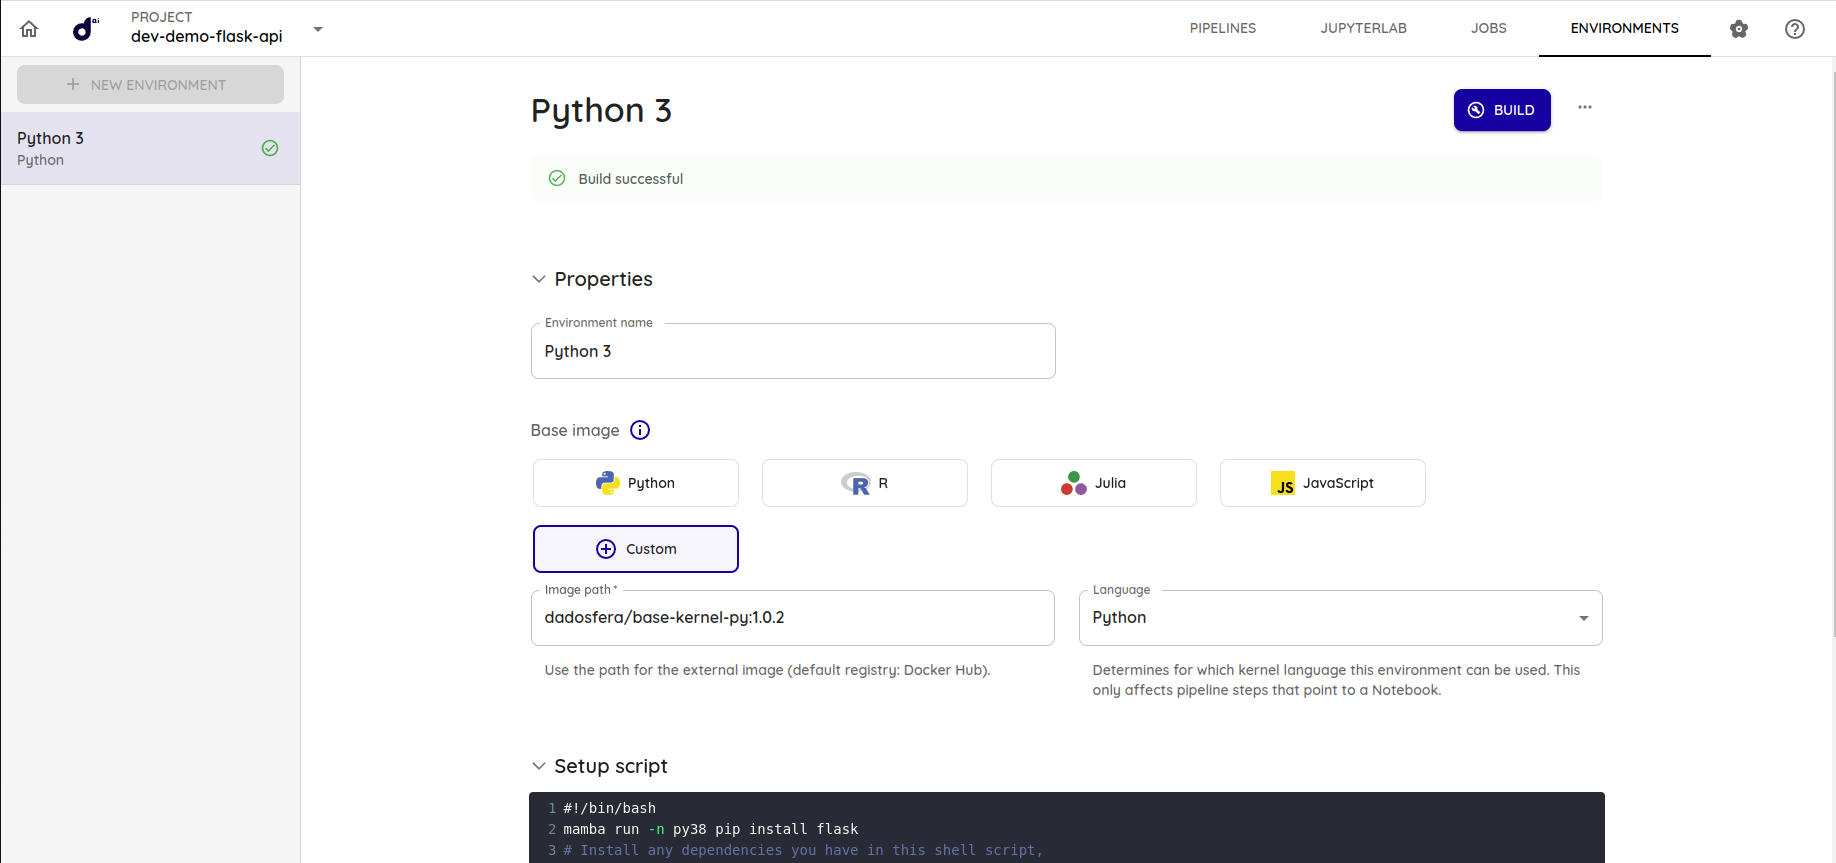
- Configure the environment exactly as shown in the image below.
- Build the environment.
Creating the Flask service
- In the Intelligence module project, click
Data Apps.
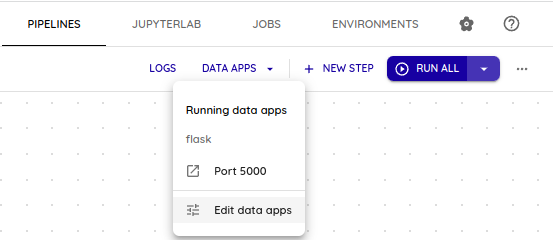
- Click
Edit data apps. - Click
Add service. - A dialog opens. Click
Create custom service. - A generic service is created. Click its row to edit the Data App.
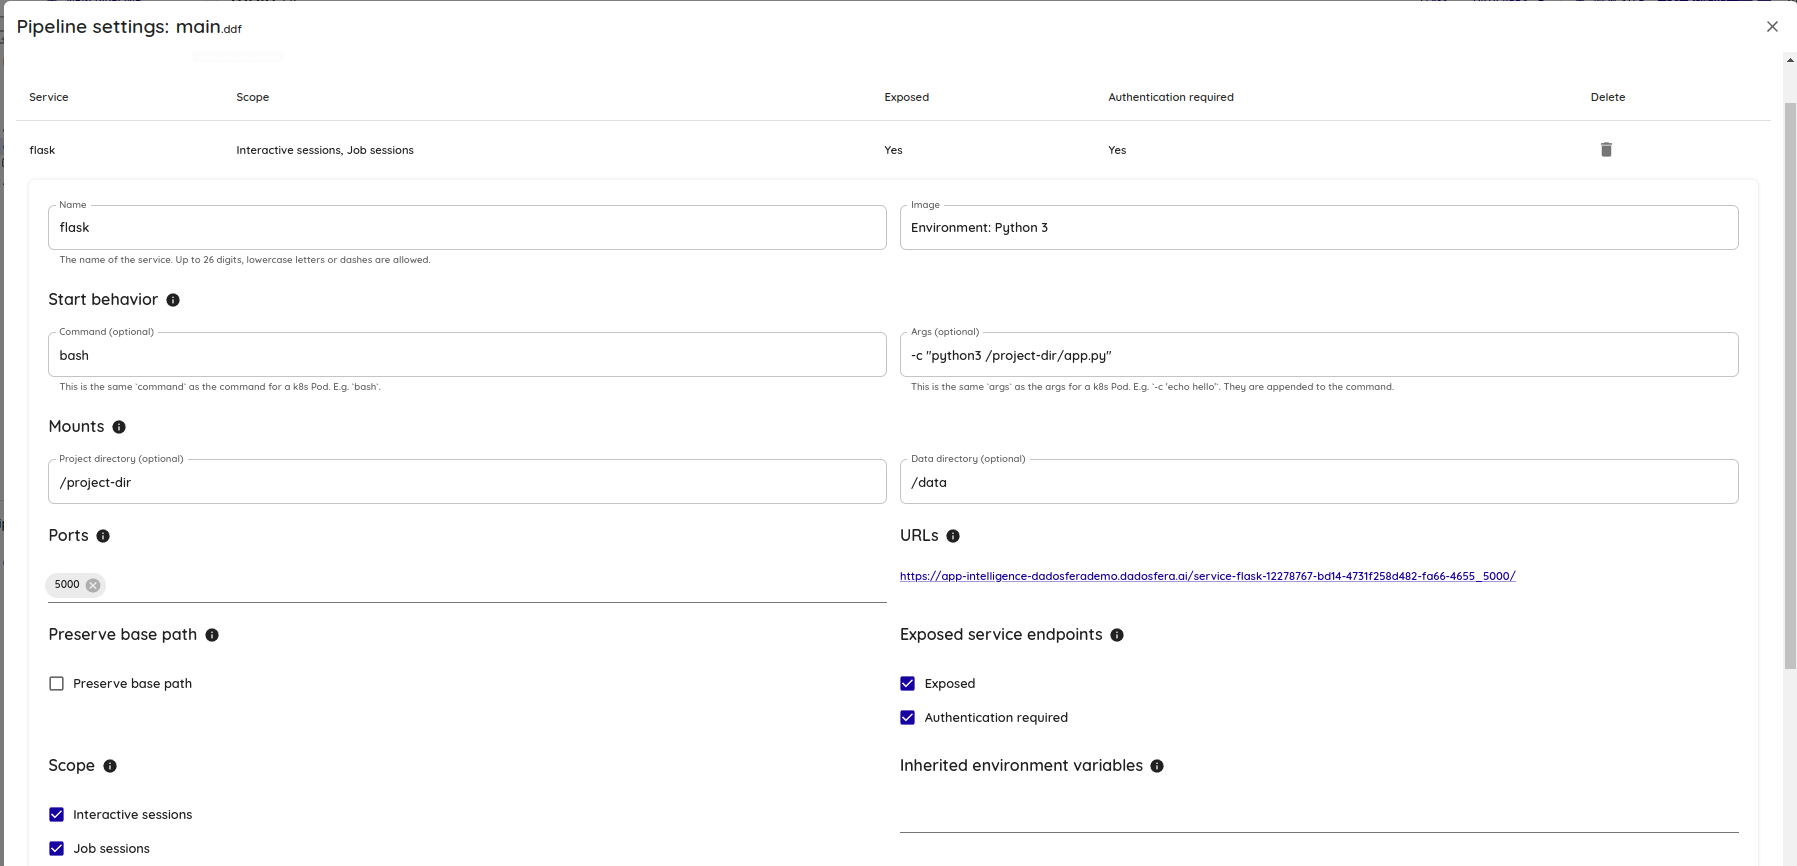
- Configure the service with the following values:
- Image: select the environment you built.
- Command:
bash - Args:
-c python3 /project-dir/app.py - Project directory:
/project-dir - Data directory:
/data - Ports: enter the port exposed by your Flask application. The default port is
5000. - Preserve Base Path: keep this option unchecked. If it is checked, because of the nginx configuration, the service is mapped to a path such as
http://internal_ip:5000/pdp-service-flask-12278767-bd14-4731f258d482-fa66-4655_5000, but for this case it needs to be mapped tohttp://internal_ip:5000/. - Exposed: this option must be enabled.
- Authentication Required: this option controls whether users must be authenticated in the Intelligence module before accessing the API.
- Save.
- Restart the session to activate the service.
Validation
When you open the URL exposed by the service, you should see the following result:
